
Wednesday, 19 October 2011
Another picture of the wooden bicycle, the PLYCYCLE.
Friday, 30 September 2011
The plycycle in the sun. Plus, accounts.
It was a sunny day, so I took the plycycle outside and took a few quick snaps. Soon I will take some proper photographs and make a site to show them off at www.plycycle.co.uk but at the moment will that link will bring you straight back to this blog.


Also, quite a few people have asked how long and how much it cost to make. Well I didn't keep a diary of the actual time it took but I have totted up the time I think I spent on it and it is about 42 hours over 6 months. However I think it would take longer than one working week to repeat because outside the actual hours I spent working on it is all the time allowed for curing of resins, paint and varnish. that would probably double the build time.
As for the cost.... well I kept the receipts and did some adding up. I nearly fell off my chair. It cost more than I thought. Its lucky I didn't charge myself labour.
Tools £ 58.35
Materials £213.78
Cycle parts £ 92.33
TOTAL £363.03
The funny thing is that the core material of plywood cost £38, the rest was on bespoke metal tubing, epoxy, varnish, spray paint etc. The frustrating thing was that often I had to buy lots more of something than I actually needed, so that has possibly inflated the actual price of some items. As for the bike parts, most came off my fixie, so actually saved lots there.
I suppose that for a hand built one of a kind bike it is not a bad price, and spread over six months it was not so bad.
Monday, 26 September 2011
The PLYCYLE, it works!
At last the chain arrived, I quickly fitted it in the exhibition space at Aardman and got the bike outside as quickly as I could. A couple of pals joined my for the maiden ride and we filmed it.
The first ride of the plycycle.
I have to say that it made me beam from ear to ear. I was happy that at long last I could actually ride the bike I had set out to make back in March.
How does it ride? Well it is well balanced, and stiffer in the frame than I had expected. There is substantial twist in the frame if you push hard on the pedals off the line of the crank, but I expected that. It is however less than I had anticipated, which is good news.
I now want to do some proper test rides and carefully find out if it will be strong enough for the road.
But whatever happens next, I am pleased as punch that the project became a reality.
I also have grown to really like the handle bars that I put on so although I had thought of making a wood/aluminium hybrid bar, I dont think I will now.
The plycycle lives.
Friday, 23 September 2011
On show.

It is sporting the new stem set, but still has no chain, and is therefore still unridden.
Saturday, 17 September 2011
Its finished...mostly.
It is mostly finished. Here look......


The mostly finished plywood frame bike.


So why is it not finished? Well I have all the bits except about 10cm of chain. In my excitement, I bought the chain I wanted without checking that it was long enough. So I need to buy another chain to match and make it up to length. Then the bike will be ridable.
I have sat on it and it didn't break, that is an achievement in itself.
However I am going to make some substitutions of some components. Mainly the stem. I fitted a classic Campagnolo style stem and I think it looks a bit weedy on the fat wooden frame. It also rakes down which I am not so keen on now. So I am changing it for a black ahead stem that will slope up to the bars. It is also a clamp type that will allow me to fit the wooden handle bars (with ally bar re-enforcement) I am hoping to make next.
I am also undecided on the bars I put on or if flat bull horns would be better. If I make bars they will be flat bull horns, a bit like the 'Charge' ones but without the upturn on the ends.
Mostly finished bike movie.
What bugs me? Well heaps, as you can imagine. The seat post is not at an angle that lies true to the frames angles. Also it slipped in its grips when setting and the seat sits ever so slightly off true. The varnish is thicker and more gaudy than I had expected. I should have done a test with it. There are lots of bumps and bits where I have either rushed or not thought a process through properly.
However. Having said all of the above, I am very proud of what I have made, having never attempted anything like this before, and having done it from my garage.
Remember this....

It ended up pretty close.
Tuesday, 13 September 2011
Varnish...at last.
Finally I am putting on the varnish. Each time I went to do it recently I found another little thing that I had forgotten to do. Just lots of little things like drilling the holes for the sheer bolts that will strengthen the rear stays. The big one was that I hadn't drilled the big hole for the seat post, and it was much more tricky than I had thought. Mainly because I didn't have the right clamps or bench to hold it securely in the correct position. So I gerry rigged up my workmate with a small pillar drill. It worked OK, but did cause a bit of vibration to begin with when I had the bit extension fitted, which caused the top of the whole to be , well, not round. So I took the extension bit off and managed to drill with the standard bit, just. But the damage was done, once the seat post was fitted I filled the wonky top of the hole with epoxy and sanded it back. Not perfect, but I have a seat post in now.
The seat post is permanently fixed in with epoxy, I thought I only needed to fit me.
I have done the varnish primer layer, thinned 50/50, I have done a first coat thinned 75/25 and I have done the first neat coat. one last coat and then wait for it to set. The varnish will take about 4 days to harden properly, then I can bolt it all together.

The seat post is permanently fixed in with epoxy, I thought I only needed to fit me.
See my less than ideal drilling rig.
I have done the varnish primer layer, thinned 50/50, I have done a first coat thinned 75/25 and I have done the first neat coat. one last coat and then wait for it to set. The varnish will take about 4 days to harden properly, then I can bolt it all together.
Varnishing in the dark....
The varnish making it look all shiny.
The way the varnish has brought the wood to life is amazing. I really didn't expect it to work as well as it does. I have used Hemple varnish and thinners and it has been great. Designed for boats, it is flexible, durable and has UV protection, hopefully that will cover every thing I need it to do.
Thursday, 1 September 2011
Sanding.
I have been sanding, sanding, sanding, sanding, sanding and sanding some more. Nearly ready to varnish.
Just got to drill a hole for the seat post.
Also, this project made the final edit of a Fixed gear bike documentary a friend of mine made, which I was interviewed for. The film is called BOIKZMOIND keep a look out for it.
.
Just got to drill a hole for the seat post.
Also, this project made the final edit of a Fixed gear bike documentary a friend of mine made, which I was interviewed for. The film is called BOIKZMOIND keep a look out for it.
.
Wednesday, 24 August 2011
The wooden frame!!!!!
Here it is, fresh out of its clamps, the two halfs finally fixed together with the metal bits and the rear stays all in ONE PIECE!


The frame all in one piece for the first time.
And a vid of the frame.. all in one piece for the first time.
What this really means is that the project has taken a massive step into the final phase. Sanding off all the resin seapage, and final smoothing to make it ready for varnishing.
I could put it together and attempt to ride it, but really I need to put the saddle in and the final strengthening bolts in the topof the stays. Its going to be tough, but I am going to resist.
Monday, 22 August 2011
Fixing and Gluing... Well epoxying.
I got to a point of no return, having got all the metal work finished, the final laminating of the main frame was upon me.


Prepping for the final epoxy fix on the main frame.
It meant a lot of guess work around the amount of resin I would need to mix up for the job, and in the end I was slightly short and had to do a hasty additional mix. The west system epoxy I have been using has been great, really easy to use at every stage. I put in the metal head tube and bottom bracket sections after the initial 'wetting up' and from there there was no going back. It was just lining it all up and clamping it into position, then cleaning down any excess epoxy after clamping from around the metal parts that I would nor be able to sand back later.

All clamped up, just need to wait for it to go off.

Head tube with decal, fixed in, no going back.
I also managed to get the back end all lined up, and fixed with epoxy the day before. It was slightly less nerve racking, although I don't know why because technically it was harder. However it all worked out. I had drilled small holes in the inside of the metal drop outs where they join the hanger to allow excess epoxy to squirt out, as the fitting with the wooden frame was too tight at the join to let it out. It allowed me to put plenty in and not worry about a dry join. When I was fixing them together I measured from the center of each stay where it joins the frame, to the end of the drop out to get them centered. I also delicately popped the wheel in to see how it lined up, it was good.

Back end all epoxied together.
Next steps are to fix the main frame and back end together, to have THE WHILE WOODEN FRAME together as one for the first time. Then to do final shaping and sanding ready for the posh yacht varnish I have procured.
Monday, 15 August 2011
Moving on.
So I made the change to the head tube angle, this will have to be it, there is no going back now. Unfortunately during the fitting and reshaping of the wood, I pranged the paint on the head tube really badly. I have had to rub it back and repaint it, which is a real shame as It was a good paint job and the head set was fitted so I have had to spray over and around the installed headset which is not ideal. But i think it will be fine.
If I hadn't messed up the head tube paint, I could have resined the main frame together, but that had to wait, will be the next job, then i can do the final shape and sand.
Rear drop outs are sprayed in the shiny green colour, just need lacquering, then I can resin the rear set together.
I also spotted a pair of leather handlebar grips on eBay, couldn't resist.
Friday, 12 August 2011
The fix?
I have had a good look for some replacement forks second hand, and there are some nice ones out there but I cant use them because I have made the head tube on the plycycle longer than average. All the second hand forks are cut down. I don't want to 'fork out' for a new set, so I am going to work with what i have.
How did the front get so out? Well... The head tube is longer (for strength binding to the wood) and therefore lifts the front of the frame, and the forks are slightly longer (off the shelf and cheap) and although individually these extras don't seem like much in the end it is about 3.5cm of lift. Enough to radically move the front of the bike away from what I had in mind.
I put the photo of the bike into photoshop and measured and analysed and this is what I think.
with the forks I have I will never get the top of the frame horizontal with the ground, I can handle that, just. As for the relationship of the front wheel to the main frame, I can play with that a bit. Luckily there is plenty of room to adjust the angle and position of the head tube mounting. So I propose moving the head tube back and steepening the angle. This will take the top of the frame further from the horizontal but I think will bring the bikes proportions back together.

Looking at the angle change in photoshop.
Hopefully I can make the tweak easily enough, and then it really is put it together time.
Wednesday, 10 August 2011
Its a wooden bike.. of sorts.
Today was a big day. I had gathered up all the remaining bits of metal work that had been having bit and pieces done to them and finally cobbled the bike together.

And this is what it looked like.

The Plycycle cobbled together for the first time.
It was mostly a success. Well the back half and the main frame anyway. I am really disappointed with how the front forks have fitted. It is my fault, I just hadn't appreciated how much different they were to the ones on my old fixie that I had based the geometry on, I bought these cheaply on eBay. It has had two main effects. The first is the gap between the front wheel and the frame is too much. Compared to the rear that is compact and more balanced it feels out on a limb. The second is that it takes the top of the frame of horizontal. Not what I had wanted.
So what do I do? The bike will work perfectly well as it is, and I dare say that once it has a saddle and handle bars fitted it will not be so noticeable. However, having got this far and to feel this disappointed makes me want to do something about it.
My plan is to try and find an old/vintage or second hand racer forks which generally have about half the distance between the crown and the wheel that the cheap bulky pair I bought have.
We shall see, if I can find a set that fit my existing head tube, and don't cost much, then perhaps I will be aesthetically saved.
Have a closer look on this vid.
Plycycle cobble, vid,
Sunday, 24 July 2011
Sanding and shaping.... Again.
This weekend I have spent time working on the wooden frame again while the metal parts are being braised. It seems like a while since I have actually worked on the frame.
I spent some time refining the shape of the taper into the rear wheel, first making the curve closer to that of the wheel and then tidying up the actual taper. I am not aiming for perfect lines as I have always wanted this to be clearly hand made, however I am also wanting to create something I will be proud of. If I had unlimited time I am sure I would refine and remake parts until I was truly happy. Isn't that always the way?
Anyway I have been using a cutting disk on an angle grinder intended for the light shaping of mild steel. However my father in law tried it on wood one day when we were restoring my wife's Morris Minor, not only did it work, it worked really well, and best of all did not over heat or clog up. It also only leaves light ridging that sand out really easily. I will use this for the final shaping of the frame once it is bonded into one.
Another job I have started is the chocking up of the bottom rear stay, having cut out too much from the main frame. Luckily I took out 12mm, so the fix was as simple as bonding in another layer of ply.


Rough shape bonded on. Sanded into shape.
I roughly cut the piece and bonded it into the stay, making sure to align the bottom bracket fin slot. Then when it had cured, I set about working it back. I spent a relaxing hour in the back garden just slowly sanding it. I am sure I could have set about it with a power tool or a quicker hand tool, but I just got into the sanding. It was quite relaxing, therapeutic I'm sure. Anyway, I got it to a place where it will fits well enough to be ready for the final fitting. It will then require more sanding to make all the shapes fit more neatly where it buts up to the main frame.
Thursday, 14 July 2011
Drop outs....
I set about getting the drop outs to fit the stays. First I had to cut the stay down to allow the metal section to centre up. Slightly nerve racking as it is a one way event. So measure check, measure check then cut, carefully. I got the top ones bang on, but the bottom ones were still a smidgen too long and had to have a screw drivers shaft with taken off, it was a precise measurement, and worked a treat.
So having got the metal work mostly in shape the thing to do was offer it up. The main adjustment needed to make it all fit was to thin the wood back on the stays. In cutting the stays back, the length of the stay that fitted the tube had shortened, so a quick bit of rasping and they all fitted well.

So having got the metal work mostly in shape the thing to do was offer it up. The main adjustment needed to make it all fit was to thin the wood back on the stays. In cutting the stays back, the length of the stay that fitted the tube had shortened, so a quick bit of rasping and they all fitted well.

Drop outs mocked in, with wheel.
When it all came together, it fitted better than I had expected, so well that I could pop the wheel gently in and see it all there for the first time. All good news, but the point of all this apart from seeing if all the planning would actually work, was to spot bond the metal components with acrylic adhesive so that I can give it all to my colleague Lew to braise up. But I ran out of time, that will have to wait, but its all there ready.
Drop out mock up detail.
Once I get the metal work done I can start the final phase of the project, final bonding, shaping and fine sanding followed by varnish. It all seems possible now.
Today I also spray painted the head tube, so it will be ready for bonding into the main frame. All I need to complete that is the transfer with the PLYCYCLE logo and some spray lacquer.
Name.
I think this bike will be called the 'Plycycle', and in order to represent this on the head tube I have knocked up a logo to go with it.


In other news the drop outs are coming on, getting to grips with the metal work.

Drop outs work in progress.
The next stage is to line up the frame accurately and tack glue the drop out components in position ready for braising. Inside they are scuffed ready for fixing to the frame. I just have to decide what adhesive I will use. I was planning to use the same epoxy as everything else, but I have been given some acrylic structural adhesive, that may just be a bit better. I will do some tests.
Tuesday, 12 July 2011
Reamed!
I collected the reamed and faced head set from Argos cycles at lunch today. On the outside it looks just as it did before, but look inside and the evidence is clear.


Head tube and fin with primer coat.

Head tube faced and reamed inside.
This week I also need to pop back with the forks to get the crown reamed to fit the headset nicely, its a while you wait job at Argos cycles.
But now I have the head tube working I can get on and do the final lamination of the frame.
Friday, 8 July 2011
Head tube.
While trying to move things on I thought I would have a go at assembling the front end of the bike. Stating with the head tube I proudly got out the head set, lined up the pieces and offered the top bearing cup up to the head tube. It didn't fit. Not just in a small way, there was just no way it was ever going in. For those of you who are reading this having made your own frame from scratch, you will now be realising how green I am to this.
I was worried that I had bought the wrong size tube or head set or both. On double checking, I had the correct ones.
I decided to swallow my pride and put in a call to the guys at Ceeway where I had bought the tubing from. They were very patient with me and explained all about reaming.
Reaming. The tubing is sold with an internal diameter that is slightly too small for the headsets. This is because as the frame is braised, distortions occur and the tubing is often not as truly round as it should be. So when the braising is complete, the frame is 'reamed and faced' to true it up and cut it out to the correct size for the head set.
So my head tube needed reaming. The tools I needed were easy to find but very expensive, so a quick web search brought up Argos racing cycles, bespoke frame builders and restorers, who are fairly local to me. I nipped over one lunch and they were more than happy to do the job for me for a fraction of the cost of the tools. Perfect. I pick it up next week.

Frame tacked together for dropout measuring.
In addition to the front end shenanigans, Lew and I have been mithering about with the drop outs. The actual drop outs have been bent to match the angles of the stays. Lew bent the stainless drop out sections with an oxyacetylene torch. The next step is to make the tube fittings to fit the wood. As mentioned below, we have revised the plans for this a couple of times, and we think we have now got a simple and effective way forward. The only recent change in plan is in how to physically join the drop out plate to the tubing. Normally a simple butt would be used and braised together. However because of the over sized tubing I need to accommodate the wooden stays, a butt was not going to work as well as we thought. It would need an insert made, and that is just too much machining for this project. so we have decided to try and squeeze the ends of the tubing into an ellipse using a jig, to take the shape of the drop out and make the braising more straight forward. Lew is testing this weekend, I will reveal the out come soon.
As you can see above I have put the frame together slightly more formally in order to get the drop out angle was right. I found that by the bottom bracket I needed a wedge, as my initial measurements had been wrong. Nothing a bit of resin and a bolt cant mend.
It was also an opportunity to start putting some of the bolts into the frame. The first being the bottom bracket ones. These now go thought the metal fin inside the frame and it is rock solid. When the frame has its final lamination (when the head tube is done) It will re-enforce it again.
I also need to start thinking for a name and a badge to put on the front.
Tuesday, 5 July 2011
Not much to show, but still going.
Its all in the title. Again, not much to show, but I have been doing little bits and pieces. Truing up the frame cut outs for the stays and the stays themselves. However the biggest focus of the build recently has been the fabrication of the metal rear drop outs. We have angled the drop out brackets to match that of the stays so the actual drop out plate runs parallel to the frame and therefore true.
I hope to have something to fit to the wooden frame soon, as that will push the build into the final phase.
I hope to have something to fit to the wooden frame soon, as that will push the build into the final phase.
Sunday, 26 June 2011
Lash it together.
It feels like a while since I made any real progress on the bike, despite having done regular bits and bobs to it over the last few weeks. Today I managed to shape the top stay set.

The way that they have come together after the redesign for the drop out fitting. Now that the stays are roughly shaped, the really tricky bit lies ahead, fitting them to the frame so that they end up square and my wheel runs true. So I fixed them to the frame with tape to see how they will sit.


The two roughly shaped stay sets.
The way that they have come together after the redesign for the drop out fitting. Now that the stays are roughly shaped, the really tricky bit lies ahead, fitting them to the frame so that they end up square and my wheel runs true. So I fixed them to the frame with tape to see how they will sit.
Stays taped on frame video.

Stays taped onto the frame.
I was very pleased that they do actually meet pretty much where I had hoped they would. Of course using tape is not a real guide. The next step in the build is to cut the excesses down on the end of the stays so they are square. Then do the same in the frame and see how it sits then. I have a feeling that I may need to add another section of ply in the bottom bracket join, as I may have cut too much away. Not sure yet.
Once the stays are fitting well it will be a case of tacking them in with wood screws and measure up and make the metal drop outs. Once those work I can do the final shaping and sanding then fitting. Once together that is it, no undoing it. I liked the way it looked so much I propped a wheel up in the frame, and y'know what? It started to look like a bike. I also took the opportunity to see how the drop out might place.


Once the stays are fitting well it will be a case of tacking them in with wood screws and measure up and make the metal drop outs. Once those work I can do the final shaping and sanding then fitting. Once together that is it, no undoing it. I liked the way it looked so much I propped a wheel up in the frame, and y'know what? It started to look like a bike. I also took the opportunity to see how the drop out might place.


Prop a wheel in just to see. Drop in the drop out.
Sunday, 12 June 2011
Glue it together.
I did the first big epoxy bond of the main frame. Judging the correct amount of epoxy to mix up was a pure guess really, and in the end I got it right, just. There was only a teaspoon full left over. It was great to see it come together and to take the clamps off and feel it as one piece at last.


First epoxy of main frame sections.
While the frame was going off, I took the opportunity to start shaping the stays.I cut a section of the 22mm tubing to fit the end of the stay to. It needed a lot of thinning down, more than I had really appreciated, but the end result looks fine and with a bit more attention will come together nicely.

Unshaped (before) and shaped (after).

Drop out tube attached to end of shaped stay.
Just got to match the second stay to the first, and then fit to the frame for the measuring, making and fitting of the drop outs. I also have to true up the sections of the frame where the stays meet the main frame so that they fit squarely.
Thursday, 2 June 2011
Final off the shelf parts.
The order from Ceeway came in this week. Some great stainless steel dropout blanks and stainless faces to be braised on. Also the 22mm cromolly tube that the drop out will be welded to and the wooden rear stays will slot into. All I have to do now is shape the wood to fit, then braise the joints together. Ha, simples!


Drop-out blanks, faces and 22mm tube.
So now I have all the bits I need to complete. I just have to find the time to make it happen. Just as before I will be stealing an hour here and there between work and family. I really want to get this finished by my original target, August. I think that is achievable.
Also thanks to everyone who is giving helpful comments and advice via twitter and this blog. Much appreciated.
Tuesday, 31 May 2011
Fitting the metal work.
I really felt like I have made a step forward with the coming together of the metal parts and the main wooden bike frame. So what did I do? Well.... I split the frame into its two halfs and inserted the metal pieces to daw around them.

I then routed out inside the markings to allow the plate sections to neatly sit between the two halfs of the frame. I also cut some slightly deepersections in the center of each plate to allow some extra epoxy to create a plug. The plate will have some holes drilled in it eventually to allow the epoxy to bond though.


Bottom bracket lined up for marking.
I then routed out inside the markings to allow the plate sections to neatly sit between the two halfs of the frame. I also cut some slightly deepersections in the center of each plate to allow some extra epoxy to create a plug. The plate will have some holes drilled in it eventually to allow the epoxy to bond though.

Botton bracket fitted.

Head tube fitted.
At the mement the pieces are fairly loose fitting because of my relative inexperience in this type of building. I think that the epoxy resin will help me out here.
The next few steps are fiddly and there will be no aparent progress, as in new parts. Its just bonding, and tweaking to get the rear stays to fit. Rear drop out parts are in the post, and will heavily influence how the back end of the bike turns out.
Saturday, 28 May 2011
Metal work, works!
I have in my grubby hands two pieces of metal work greatness. Lew ( the engineering man) made the parts up for me from my card board templates. I had stock head tube section and a standard blank bottom bracket shell from Ceeway, which I bought back at the start of the wooden bike build in order to measure up to. As the wooden frame came together and I understood more clearly where and how the metal parts would need to fit, I was able to discuss the detail with Lew. He then made a jig to hold the plate at 90 deg' to the tube as he braised them together.

Hopefully this shows how I intend to sandwich the fin between the yet to be laminated wooden layers that make up the wooden bike frame. The Head tube has a wedge shape to it in an effort to increase its holding strength in the frame, it may well be bolted through as a precaution too.


Head tube and fin fixing.
Hopefully this shows how I intend to sandwich the fin between the yet to be laminated wooden layers that make up the wooden bike frame. The Head tube has a wedge shape to it in an effort to increase its holding strength in the frame, it may well be bolted through as a precaution too.

Bottom bracket with fitting fin.
With the bottom bracket, we decided to take the fin all the way around the shell. Originally I had intended to have the bottom section of the bracket shell exposed with the fin similar to the head tube. But then I decided to surround the shell with wood, and after discussion with a couple of engineering types it seemed a good idea to get as much strength into the bottom bracket area as possible. It seems obvious, but the stresses going through this section are huge, especially if I go fixed gear or single speed with the bike. Gearing it will drasticly reduce the loading, but I don't really want that.
Next I need to paint the bits that will be exposed to the outside, while leaving the bits bare that will have direct epoxy resin contact.
I have also just ordered from Ceeway, two blank stainless track style drop outs and some 22mm tube to make the rear stay/drop our connections. I had hoped to use the left over head tube but it was just too big at 31mm diameter. Ceeway is just a treasure trove of frame building bits.
On the wood working front, I hope to have the stays shaped soon and if the weather is warm enough I will have a go at the first stage of bonding the four frame layers into two halfs.
Monday, 23 May 2011
Stays MK-2
I re-measured and re-cut the rear stays this weekend following the new design for the drop outs. I also epoxied the three layers together.


One set of stays clamped with fresh epoxy resin and one behind cured and ready for shaping.
After the initial cure to solid, it takes a further two days for the epoxy to properly cure to full strength, and I resisted the temptation to start early, just. Worth the wait I'm sure. I started basic shaping, the parts were cut over size to allow for fitting and fine tuning. This is the part where I have to try and not take too much away, and get it working properly. Little by little.

Top stays with some basic shaping.
The good news is that the stays feel very strong and I am really happy with the way that this element has come together. But as one part is solved the next challenge arises. Once shaping is complete, I have to create a rig for aligning the stays to the frame and wheel. Essential if I want to go in a straight line. it will mainly consist of carefully cut right angle pieces mounted on a big flat piece of ply. My left over 25mm piece I abandoned earlier on in the project should be great for this. I will have to work with the main frame on is side and elevated on blocks. This will then allow me to line up the stays. I think i will tack them in place, then fit a couple of wooden pegs to hold position. These will also work when i take it apart for the epoxy fixing.
Thursday, 19 May 2011
One step forward another back.
I just popped in to see Lou the engineer, and he has the bottom bracket plate cut, ready to braze onto the bottom bracket shell this weekend along with the head tube fitting. This is amazing as he is very good at what he does as well as being an ex cycle racer back in the day and is really keen to help me out. Can't wait to see the finished items.
The set back is not that great, but i am going to have to re-cut the six rear stay sections. After a brief chat with Lou last week, we decided upon a slight redesign in the rear stay set up. Mimicking a traditional rear stay with a tube butted onto a plate, but over sized. My original design was based on what i could achieve, with with Lou happy to help out the design can be improved and made more complex.
so I will be laying out and cutting this weekend.
Also just to mention that the epoxy resin test (pictured below) went very well indeed. When cured the strength gain is immense, I tried to snap it but I couldn't. It was only when I tried to prise it apart with a chisel that it started to go, and it resisted that well too. That is good news.
Saturday, 14 May 2011
Got lots done.
A bit of progress. Firstly I cut some rear stays and tacked them onto the main frame. The main reason for doing this was to ascertain whether the crank would clear the bottom stay. I am pleased to say it does. See the vid.


Crank clearance test.
The other reason for tacking on the stays was to see if they lined up and would actually fit. They did, so I made four more. Each stay will be made of three layers of the 12mm birch ply.

Rear stays all cut.
I spoke to the resident mechanical engineer at work about giving me some help with the fabrication of the bespoke metal fastenings. He had a great idea about how to connect the stays to the drop outs. I had always been worried about weakening the stay by drilling it, his suggestion was to make the end of the stay round and slot it into a metal tube that in turn would be welded to the drop out. I like it, quite simple and will maintain the strength of the stay.
After my last post, I did get the epoxy I wanted, even if I did have to cycle to the other side of town. I bought a small kit of West System Epoxy to learn how to use it. So the first thing I did today was to mix up a small amount (30ml) and have a go at laminating three strips of off-cuts. I found it easy to use thanks to the very clear instructions. I haven't gone back to see how strong it is but I am confident it will be fine.

Epoxy Resin test.
But the big job today was to split off the two outer layers of the main frame and to reduce weight by cutting out as much as I dared. The idea being that when the outer layers are laminated on top it will create a box section and maintain strength but loose weight, as the frame is really quite heavy at the mo.

Drilled out.

Shapes cut with jig saw.
I drew on the shapes I wanted then drilled out the main cavities. I then trimmed out the remaining bits with a jig saw. What I didn't do was weigh the frame before and after, but it has made a huge difference. I like the look of it. My son asked why the whole frame couldn't look like this. Its a good question, I think it would look great, but I don't think it would be strong enough. I think the box section idea is vital, as I think the frame would flex too much if opened up like this. Also I would have taken more care on the cutting had that been the plan. Next time maybe.
Just the curve around the back wheel, head set groove to drill out and the rear stay shaping to do to complete the wood work. Metal work next. Then fix it all together.
Friday, 6 May 2011
Poxy epoxy.
I went to get some epoxy resin today, but the shop didnt have what I wanted. So I will have to go to the place I know has it but is the other side of town.
If I can get some resin then I can start testing with some off cuts for the laminating process. Seeing as I have never done any epoxy based bonding, I think it best not to experiment on the actual frame.
I also held up a wheel to the frame today to work out the rear stay lengths. I think I will have to cut into the rear curve that follows the wheel contour as I am going to have to bring the wheel about an inch closer to the frame than I had originally thought. Its not a problem at all, I had just got used to how it was looking and the cut will change that shape.
Thursday, 5 May 2011
The frame shaping continues.
I have ben bevering away at making the shapes on the ply wood frame look good. I relly like the way it is turning out now.


I am going to get the resin soon and then take out the center two layers so that I can drill them out to reduce the weight. Next fabrication job is to cut and shape the rear stays.
Friday, 29 April 2011
I started again. Wooden bike frame MK2
I did it, I started again. The wooden bike frame had got to a point where I had to make a decision, as I explained in the last build post. It just didnt feel right. So I umm'd and arr'd and eventually I jumped into my van and went to a new ply wood supplier. Avon plywood. They were brilliant. I talked it over with the man there and we decided that I should go with Birch ply, my original plan. I bought a sheet of 12mm birch ply and set to work.
Having done it once the second attempt at the wooden bike frame came together much faster. In a couple of hours I was back to the same place as the first frame.


Having done it once the second attempt at the wooden bike frame came together much faster. In a couple of hours I was back to the same place as the first frame.
Work in progress.


I took the opportunity to make an amendment, I noticed that there was possibly not enough space for the seat post to slot in and maintain enough strength, so I extended this in the new frame.
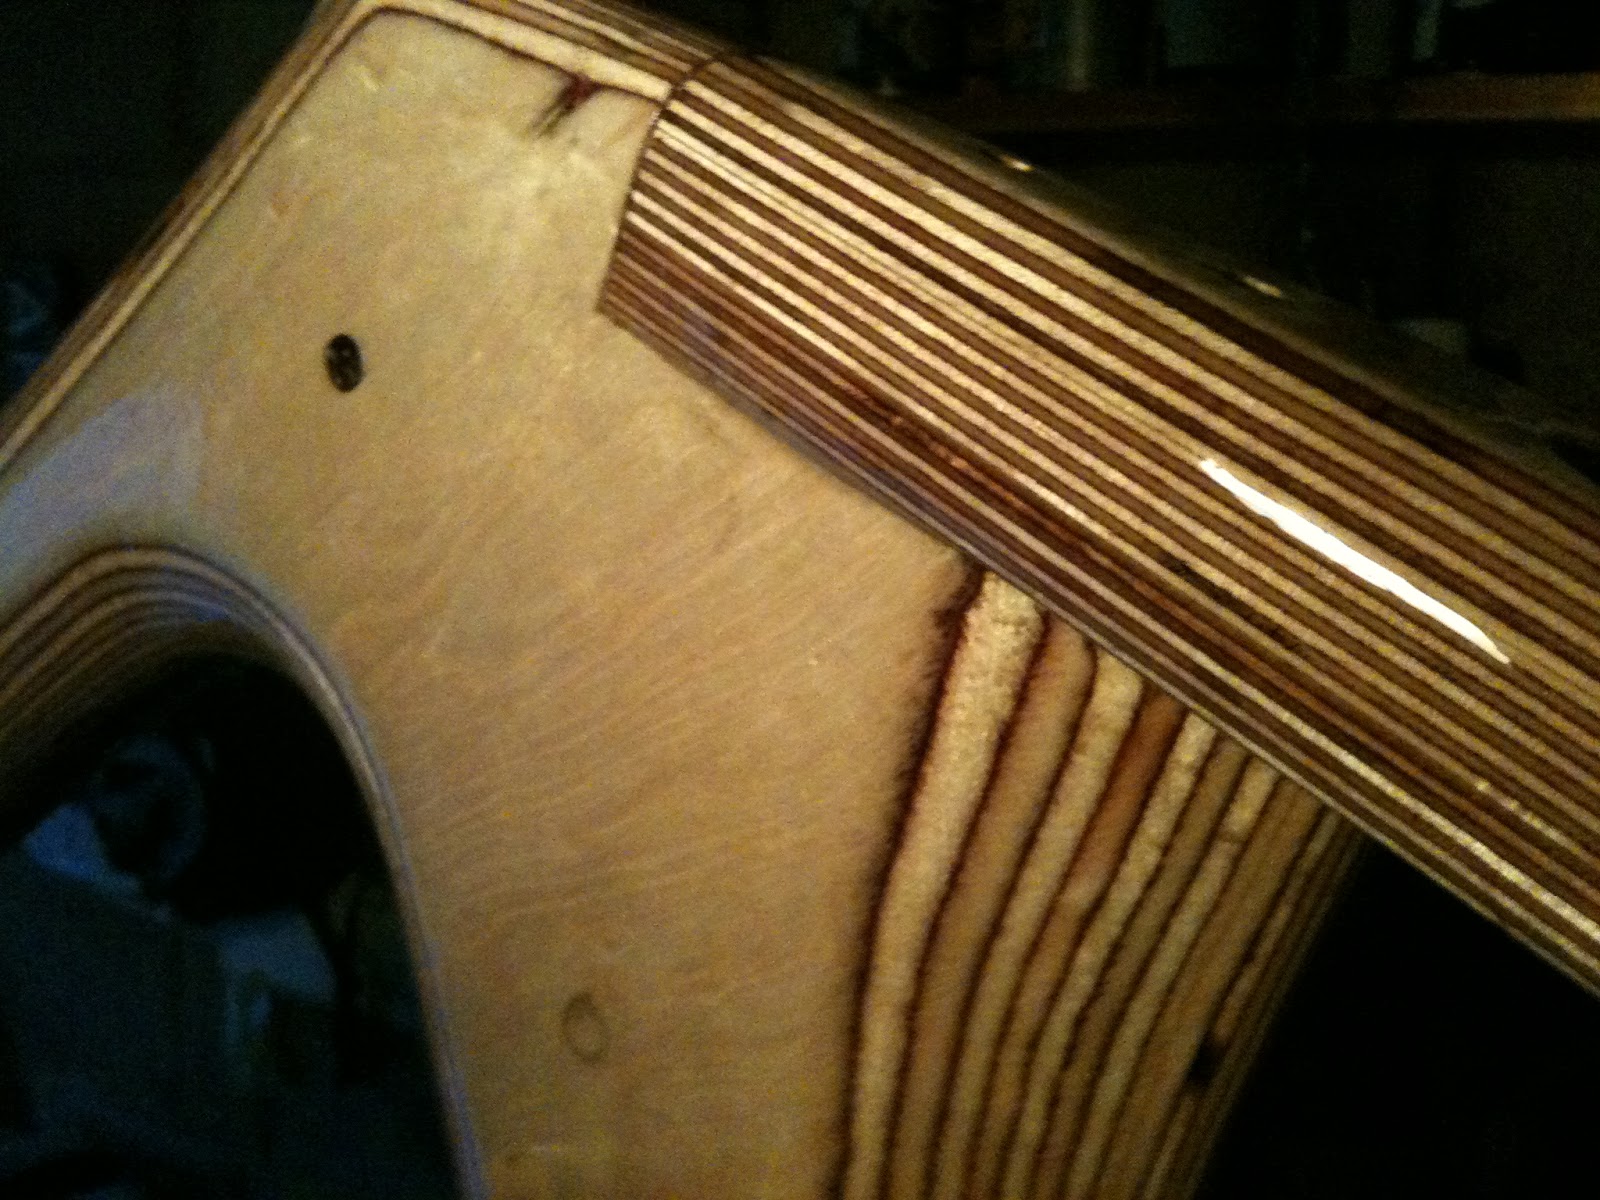
The first most striking difference apart from being much lighter in colour, is that bitch ply has many more possibly twice as many laminate layers as the hard wood ply in the same cross section, this gives it a very different feel. The birch is also easier to work on. The look as the curves are worked in is much more striking (see the video) and I have a much better feeling about this build.
Old frame MK1 darker - New frame MK2 lighter.

The main reason for loosing confidence in the last frame was the amount of air gaps between the laminate layers. Looking this over with the fella from Avon ply, he thought it was just bad luck on my first sheet of 25mm hard wood ply. However, the new wood has no voids yet. This gives me renewed confidence, as I was hatching all sorts of plans to inject epoxy resin into the voids in the MK1 frame.
Just seen this has uploaded sideways, sent from my phone, didn't check it, didn't keep it, that'll teach me.
As you can see in the vid, I have now got four layers of ply wood in the frame. This will mean two extra fixings of epoxy, but will make the cutting out of the middle two layers for weight reduction much easier as I would have had to use a router on MK1. I can just use a large hole cutter on the two matching middle sections.
I am really glad I started again, I feel much happier about it now, even if I have had to spend on a new sheet of ply. I learnt a lot on MK1 and know that MK2 will be better.
Tuesday, 26 April 2011
Rear hub...
So, I said back in the beginning that this would be a fixed gear bike, and so it probably will be. But my attention has been drawn to an amazing hub gear from Sturmey Archer. It is a two speed kick change back pedal brake hub. Yes a bit of a mouth full but its amazing. No cables! Just kick back to change between the two gears. There is a free wheel, but put in a back pedal and it is a traditional American style brake. I love the fact that it will need no cabling. It is £70 for the hub only, which as nice hubs go is not that much, but in truth is probably more than I want to spend on this project right now.
It would be nice though.
It would be nice though.
A bit of frame shaping.
Wit a few hours sneaked in over the last week end I managed to start roughly shaping the wooden bike frame. It is very early in the process and I have cut the frame over large so that I can work it back quite a way while finding a shape I like. The first steps were promising, as the lines that the laminated layers of the ply wood give as it is shaped look just how I had hoped they would.


The only thing is that the more I work with this hard wood ply that I have bought, the less confident I am in it. I think it is too brittle. I may have to use this frame as a test. I have been mulling it over and four layers of 12mm marine birch marine ply would do it. Going for the 12mm, would make it affordable, rather than the 25mm that I went for here. Part of the problem is that the ply I bought wasn't marine grade, and the gaps in lamination are just too frequent and I think the weak spots it makes are just too much.
I suppose I knew this strength issue when I started, but thought I could get by it with careful cutting and some epoxy resin. It may well work, but I am bracing myself for a restart.
On a more technical note, I bought a 40mm hole cutter for the bottom bracket placement. Drilled the hole and it fits perfectly. Big smile. I will now get together with the mechanical engineer at work who has kindly offered to help me out a bit with the metal fabrication work around the bottom bracket and head tube.
However, I have really enjoyed the basic shaping I have done this weekend, it has been the first time the frame has started to have a real feel about it in the way I saw in my head back along. I wont mind if I have to do it again as I love the process.
Subscribe to:
Posts (Atom)