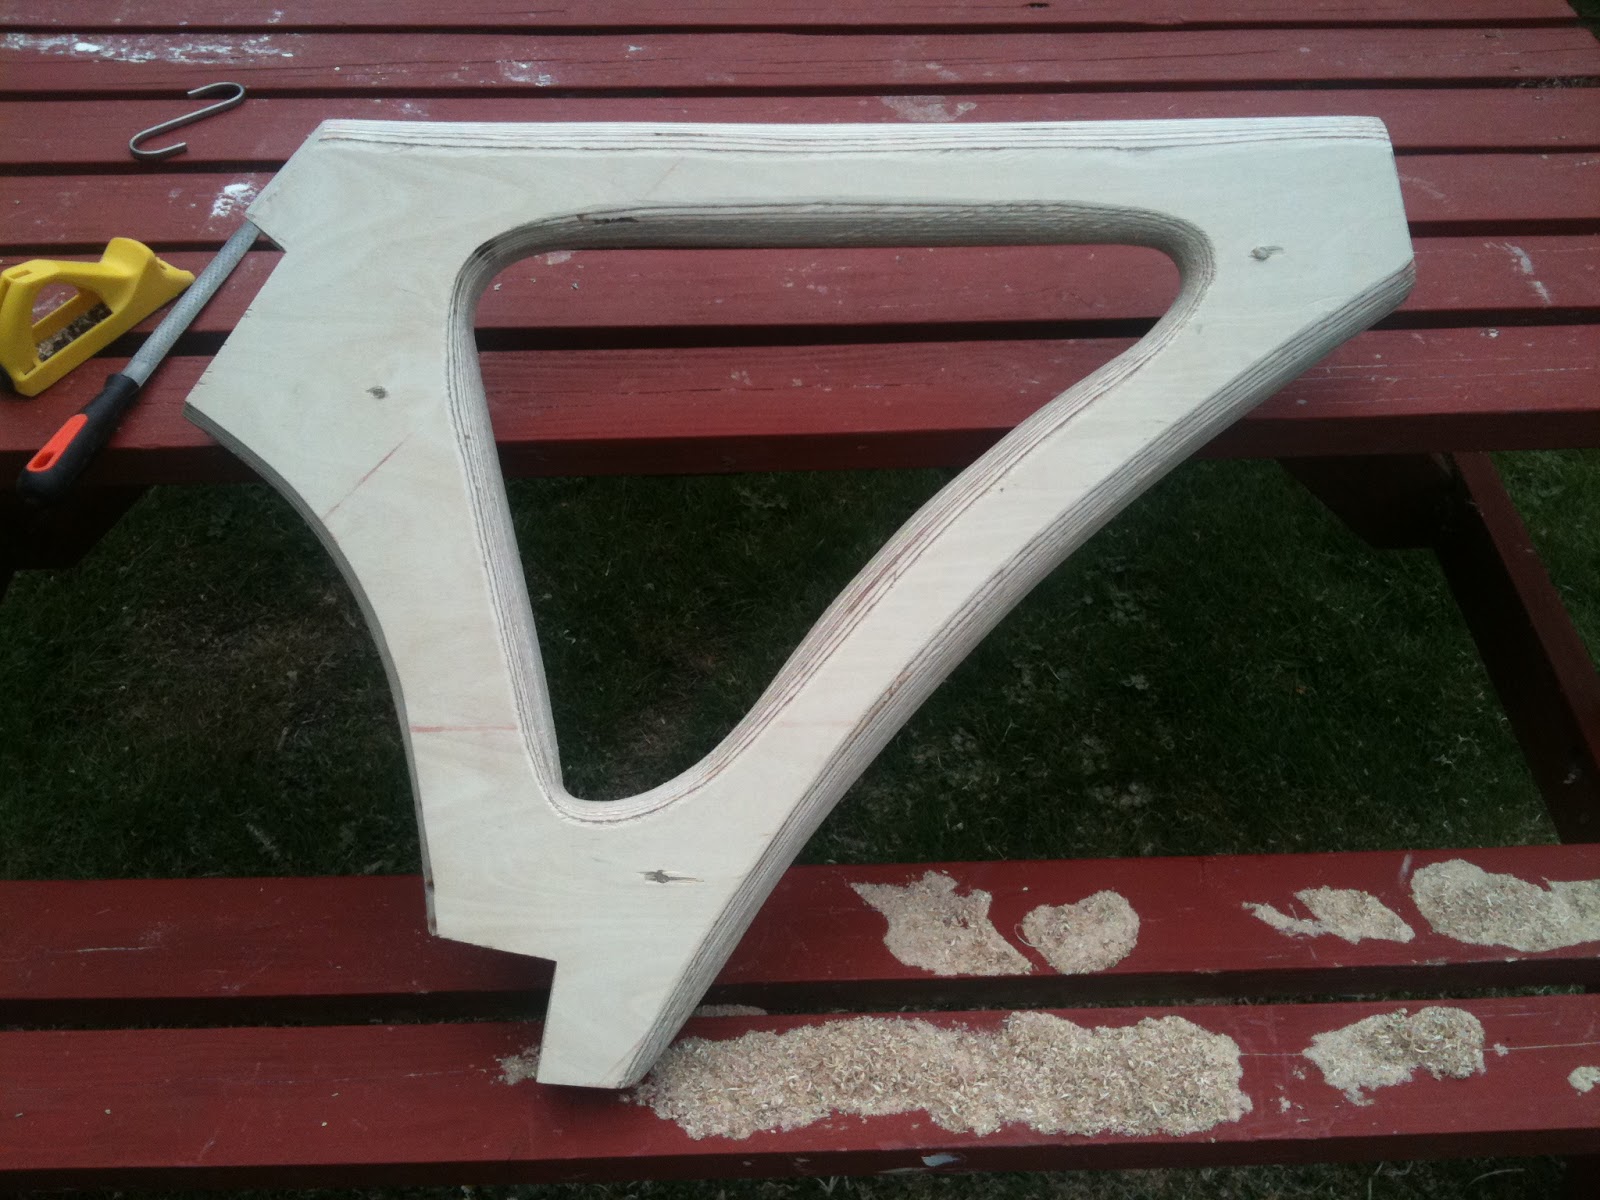
Here it is, fresh out of its clamps, the two halfs finally fixed together with the metal bits and the rear stays all in ONE PIECE!
The frame all in one piece for the first time.
And a vid of the frame.. all in one piece for the first time.
What this really means is that the project has taken a massive step into the final phase. Sanding off all the resin seapage, and final smoothing to make it ready for varnishing.
I could put it together and attempt to ride it, but really I need to put the saddle in and the final strengthening bolts in the topof the stays. Its going to be tough, but I am going to resist.
I have had a good look for some replacement forks second hand, and there are some nice ones out there but I cant use them because I have made the head tube on the plycycle longer than average. All the second hand forks are cut down. I don't want to 'fork out' for a new set, so I am going to work with what i have.
How did the front get so out? Well... The head tube is longer (for strength binding to the wood) and therefore lifts the front of the frame, and the forks are slightly longer (off the shelf and cheap) and although individually these extras don't seem like much in the end it is about 3.5cm of lift. Enough to radically move the front of the bike away from what I had in mind.
I put the photo of the bike into photoshop and measured and analysed and this is what I think.
with the forks I have I will never get the top of the frame horizontal with the ground, I can handle that, just. As for the relationship of the front wheel to the main frame, I can play with that a bit. Luckily there is plenty of room to adjust the angle and position of the head tube mounting. So I propose moving the head tube back and steepening the angle. This will take the top of the frame further from the horizontal but I think will bring the bikes proportions back together.
Looking at the angle change in photoshop.
Hopefully I can make the tweak easily enough, and then it really is put it together time.
This weekend I have spent time working on the wooden frame again while the metal parts are being braised. It seems like a while since I have actually worked on the frame.
I spent some time refining the shape of the taper into the rear wheel, first making the curve closer to that of the wheel and then tidying up the actual taper. I am not aiming for perfect lines as I have always wanted this to be clearly hand made, however I am also wanting to create something I will be proud of. If I had unlimited time I am sure I would refine and remake parts until I was truly happy. Isn't that always the way?
Anyway I have been using a cutting disk on an angle grinder intended for the light shaping of mild steel. However my father in law tried it on wood one day when we were restoring my wife's Morris Minor, not only did it work, it worked really well, and best of all did not over heat or clog up. It also only leaves light ridging that sand out really easily. I will use this for the final shaping of the frame once it is bonded into one.
Another job I have started is the chocking up of the bottom rear stay, having cut out too much from the main frame. Luckily I took out 12mm, so the fix was as simple as bonding in another layer of ply.
Rough shape bonded on. Sanded into shape.
I roughly cut the piece and bonded it into the stay, making sure to align the bottom bracket fin slot. Then when it had cured, I set about working it back. I spent a relaxing hour in the back garden just slowly sanding it. I am sure I could have set about it with a power tool or a quicker hand tool, but I just got into the sanding. It was quite relaxing, therapeutic I'm sure. Anyway, I got it to a place where it will fits well enough to be ready for the final fitting. It will then require more sanding to make all the shapes fit more neatly where it buts up to the main frame.
I think this bike will be called the 'Plycycle', and in order to represent this on the head tube I have knocked up a logo to go with it.
In other news the drop outs are coming on, getting to grips with the metal work.
Drop outs work in progress.
The next stage is to line up the frame accurately and tack glue the drop out components in position ready for braising. Inside they are scuffed ready for fixing to the frame. I just have to decide what adhesive I will use. I was planning to use the same epoxy as everything else, but I have been given some acrylic structural adhesive, that may just be a bit better. I will do some tests.
Its all in the title. Again, not much to show, but I have been doing little bits and pieces. Truing up the frame cut outs for the stays and the stays themselves. However the biggest focus of the build recently has been the fabrication of the metal rear drop outs. We have angled the drop out brackets to match that of the stays so the actual drop out plate runs parallel to the frame and therefore true.
I hope to have something to fit to the wooden frame soon, as that will push the build into the final phase.
It feels like a while since I made any real progress on the bike, despite having done regular bits and bobs to it over the last few weeks. Today I managed to shape the top stay set.
The two roughly shaped stay sets.
The way that they have come together after the redesign for the drop out fitting. Now that the stays are roughly shaped, the really tricky bit lies ahead, fitting them to the frame so that they end up square and my wheel runs true. So I fixed them to the frame with tape to see how they will sit.
Stays taped on frame video.
Stays taped onto the frame.
I was very pleased that they do actually meet pretty much where I had hoped they would. Of course using tape is not a real guide. The next step in the build is to cut the excesses down on the end of the stays so they are square. Then do the same in the frame and see how it sits then. I have a feeling that I may need to add another section of ply in the bottom bracket join, as I may have cut too much away. Not sure yet.
Once the stays are fitting well it will be a case of tacking them in with wood screws and measure up and make the metal drop outs. Once those work I can do the final shaping and sanding then fitting. Once together that is it, no undoing it. I liked the way it looked so much I propped a wheel up in the frame, and y'know what? It started to look like a bike. I also took the opportunity to see how the drop out might place.
Prop a wheel in just to see. Drop in the drop out.
The order from Ceeway came in this week. Some great stainless steel dropout blanks and stainless faces to be braised on. Also the 22mm cromolly tube that the drop out will be welded to and the wooden rear stays will slot into. All I have to do now is shape the wood to fit, then braise the joints together. Ha, simples!
Drop-out blanks, faces and 22mm tube.
So now I have all the bits I need to complete. I just have to find the time to make it happen. Just as before I will be stealing an hour here and there between work and family. I really want to get this finished by my original target, August. I think that is achievable.
Also thanks to everyone who is giving helpful comments and advice via twitter and this blog. Much appreciated.
I have ben bevering away at making the shapes on the ply wood frame look good. I relly like the way it is turning out now.
I am going to get the resin soon and then take out the center two layers so that I can drill them out to reduce the weight. Next fabrication job is to cut and shape the rear stays.
I did it, I started again. The wooden bike frame had got to a point where I had to make a decision, as I explained in the last build post. It just didnt feel right. So I umm'd and arr'd and eventually I jumped into my van and went to a new ply wood supplier. Avon plywood. They were brilliant. I talked it over with the man there and we decided that I should go with Birch ply, my original plan. I bought a sheet of 12mm birch ply and set to work.
Having done it once the second attempt at the wooden bike frame came together much faster. In a couple of hours I was back to the same place as the first frame.
Work in progress.
I took the opportunity to make an amendment, I noticed that there was possibly not enough space for the seat post to slot in and maintain enough strength, so I extended this in the new frame.
The first most striking difference apart from being much lighter in colour, is that bitch ply has many more possibly twice as many laminate layers as the hard wood ply in the same cross section, this gives it a very different feel. The birch is also easier to work on. The look as the curves are worked in is much more striking (see the video) and I have a much better feeling about this build.
Old frame MK1 darker - New frame MK2 lighter.
The main reason for loosing confidence in the last frame was the amount of air gaps between the laminate layers. Looking this over with the fella from Avon ply, he thought it was just bad luck on my first sheet of 25mm hard wood ply. However, the new wood has no voids yet. This gives me renewed confidence, as I was hatching all sorts of plans to inject epoxy resin into the voids in the MK1 frame.
Just seen this has uploaded sideways, sent from my phone, didn't check it, didn't keep it, that'll teach me.
As you can see in the vid, I have now got four layers of ply wood in the frame. This will mean two extra fixings of epoxy, but will make the cutting out of the middle two layers for weight reduction much easier as I would have had to use a router on MK1. I can just use a large hole cutter on the two matching middle sections.
I am really glad I started again, I feel much happier about it now, even if I have had to spend on a new sheet of ply. I learnt a lot on MK1 and know that MK2 will be better.
So I did it I took the saw to my quite expensive piece of ply wood. It is the bit I have been looking forward to the most in this whole wooden bike building project. The first cut. I used the card board templates to mark out and just got stuck in. As it turns out I have enough ply for a second attempt if I make a boo boo on this first attempt.
I cut two pieces from the same template, which are now mostly the same shape. Next I need to temporarily fix them together so that I can shape them to be exactly the same shape. This will also include detailing and trimming to reduce weight.
I also marked out a rough template for the rear stays, but they are not cut out yet, the video shows the two parts of the frame, cut and lying together.
I have decided to use West Systems Epoxy in my build. It looks like it will do everything I need. Most of all they put out a really great info booklet and DVD to help first timer like me. The main place the epoxy will be used is to join my two halfs of the frame and probably to reinforce internal sections I router out for weight saving.
Ah ha ha haaa, a couple more bits arrived in the post. I have gone for a 1 inch head tube and fork set up. I had already bought the head tube section of tube ready for cutting down to size, so I needed to get a set of forks. I have to make this bike as economically as I can, so I have not gone for super light or posh branded components so far. I am not anticipating this bike to be light weight, but I hope it wont be cumbersomely heavy either. Anyway, I found a set of forks that will fit nicely and look nice. Being fairly cheap they are slightly chunky, but I think this will help with the inevitably slightly more chunky look the wood will have. Also a great thing about this set of forks is that the threaded section is over long and can be cut to size. Many of the budget forks have a pre determined thread length.
I bought the stem from Velo Solo a great web site supplying specialist parts for fixed gear bikes. It is a reforge of a very popular old Cinelli stem. I already have one on my classic 1980's Ralleigh fixie, it is a stylish looking stem, but best of all doesn't break the bank. I also have a new head set in the garage left over from my fixie conversion, I didn't use it as I chose to restore the original instead of going new.
So the bits and bobs are gathering, I want to get some wood next to do some testing.
Today I started swatting up on plywood for the frame components of my wooden bike. I am lucky that in Bristol there are a couple of very good suppliers, who stock a variety of hard wood ply in most thickness's. I have based my design around 25mm ply, so that is a given, what is not so cut and dry is the wood base of the ply. The one I have my eye on is a 100% mahogany ply. The only problem with that is the cost, £168 per 8x4 sheet. Too much for a test project, maybe if the proof of concept bike works I can make another with the expensive wood. So the question is, what else is out there. Well the main wood in cheap ply is spruce, a soft wood, which although lighter, I have ruled out because I don't think it will be strong enough in the high stress parts of the frame in the longer term. So that leaves other hard wood options. The one that seems best, affordable and made to high standards is birch ply. It is the most commonly available high quality ply, both my local suppliers carry graded birch ply from rough and full of knots to architectural grade. Best of all, birch ply usually comes from sustainable forestry, something that is harder to to be sure of with the more exotic hard woods. The really good stuff is about £45 a 8x4 sheet, I think this is what I will go for.
Having been all excited about materials and getting started, it dawned upon me to focus a little more on the actual design of the bicycle. Bicycle design can be just a few sketches on paper, like I did below, but I thought I would have a crack at Bike CAD an on-line bicycle design tool. It is set up with some basic templates for most bicycle styles that are then 100% customisable. So I went with a road frame and entered my hight and
chose some parameters, below is what came out. I have a geared bike and a fixed gear bike and I enjoy both for different reasons, but as you can see here I have gone for a single speed design, mainly because for my first complete build it will be easier.
Bike CAD is set up for steel framed bikes so I am looking at this for basic measurements and geometry. I found it really useful to be able to type in different seat post angles and see the changes to all the other angles straight away. No doubt this will evolve, but I like the basic simple shape of this bike and I hope it will be possible for me to adapt this into wood with out too many changes to the frame geometry.