
Showing posts with label wooden bike. Show all posts
Showing posts with label wooden bike. Show all posts
Wednesday, 19 October 2011
Another picture of the wooden bicycle, the PLYCYCLE.


Saturday, 17 September 2011
Its finished...mostly.
It is mostly finished. Here look......


The mostly finished plywood frame bike.


So why is it not finished? Well I have all the bits except about 10cm of chain. In my excitement, I bought the chain I wanted without checking that it was long enough. So I need to buy another chain to match and make it up to length. Then the bike will be ridable.
I have sat on it and it didn't break, that is an achievement in itself.
However I am going to make some substitutions of some components. Mainly the stem. I fitted a classic Campagnolo style stem and I think it looks a bit weedy on the fat wooden frame. It also rakes down which I am not so keen on now. So I am changing it for a black ahead stem that will slope up to the bars. It is also a clamp type that will allow me to fit the wooden handle bars (with ally bar re-enforcement) I am hoping to make next.
I am also undecided on the bars I put on or if flat bull horns would be better. If I make bars they will be flat bull horns, a bit like the 'Charge' ones but without the upturn on the ends.
Mostly finished bike movie.
What bugs me? Well heaps, as you can imagine. The seat post is not at an angle that lies true to the frames angles. Also it slipped in its grips when setting and the seat sits ever so slightly off true. The varnish is thicker and more gaudy than I had expected. I should have done a test with it. There are lots of bumps and bits where I have either rushed or not thought a process through properly.
However. Having said all of the above, I am very proud of what I have made, having never attempted anything like this before, and having done it from my garage.
Remember this....

It ended up pretty close.
Thursday, 1 September 2011
Sanding.
I have been sanding, sanding, sanding, sanding, sanding and sanding some more. Nearly ready to varnish.
Just got to drill a hole for the seat post.
Also, this project made the final edit of a Fixed gear bike documentary a friend of mine made, which I was interviewed for. The film is called BOIKZMOIND keep a look out for it.
.
Just got to drill a hole for the seat post.
Also, this project made the final edit of a Fixed gear bike documentary a friend of mine made, which I was interviewed for. The film is called BOIKZMOIND keep a look out for it.
.
Monday, 15 August 2011
Moving on.
So I made the change to the head tube angle, this will have to be it, there is no going back now. Unfortunately during the fitting and reshaping of the wood, I pranged the paint on the head tube really badly. I have had to rub it back and repaint it, which is a real shame as It was a good paint job and the head set was fitted so I have had to spray over and around the installed headset which is not ideal. But i think it will be fine.
If I hadn't messed up the head tube paint, I could have resined the main frame together, but that had to wait, will be the next job, then i can do the final shape and sand.
Rear drop outs are sprayed in the shiny green colour, just need lacquering, then I can resin the rear set together.
I also spotted a pair of leather handlebar grips on eBay, couldn't resist.
If I hadn't messed up the head tube paint, I could have resined the main frame together, but that had to wait, will be the next job, then i can do the final shape and sand.
Rear drop outs are sprayed in the shiny green colour, just need lacquering, then I can resin the rear set together.
I also spotted a pair of leather handlebar grips on eBay, couldn't resist.
Sunday, 24 July 2011
Sanding and shaping.... Again.
This weekend I have spent time working on the wooden frame again while the metal parts are being braised. It seems like a while since I have actually worked on the frame.
I spent some time refining the shape of the taper into the rear wheel, first making the curve closer to that of the wheel and then tidying up the actual taper. I am not aiming for perfect lines as I have always wanted this to be clearly hand made, however I am also wanting to create something I will be proud of. If I had unlimited time I am sure I would refine and remake parts until I was truly happy. Isn't that always the way?
Anyway I have been using a cutting disk on an angle grinder intended for the light shaping of mild steel. However my father in law tried it on wood one day when we were restoring my wife's Morris Minor, not only did it work, it worked really well, and best of all did not over heat or clog up. It also only leaves light ridging that sand out really easily. I will use this for the final shaping of the frame once it is bonded into one.
Another job I have started is the chocking up of the bottom rear stay, having cut out too much from the main frame. Luckily I took out 12mm, so the fix was as simple as bonding in another layer of ply.


I spent some time refining the shape of the taper into the rear wheel, first making the curve closer to that of the wheel and then tidying up the actual taper. I am not aiming for perfect lines as I have always wanted this to be clearly hand made, however I am also wanting to create something I will be proud of. If I had unlimited time I am sure I would refine and remake parts until I was truly happy. Isn't that always the way?
Anyway I have been using a cutting disk on an angle grinder intended for the light shaping of mild steel. However my father in law tried it on wood one day when we were restoring my wife's Morris Minor, not only did it work, it worked really well, and best of all did not over heat or clog up. It also only leaves light ridging that sand out really easily. I will use this for the final shaping of the frame once it is bonded into one.
Another job I have started is the chocking up of the bottom rear stay, having cut out too much from the main frame. Luckily I took out 12mm, so the fix was as simple as bonding in another layer of ply.


Rough shape bonded on. Sanded into shape.
I roughly cut the piece and bonded it into the stay, making sure to align the bottom bracket fin slot. Then when it had cured, I set about working it back. I spent a relaxing hour in the back garden just slowly sanding it. I am sure I could have set about it with a power tool or a quicker hand tool, but I just got into the sanding. It was quite relaxing, therapeutic I'm sure. Anyway, I got it to a place where it will fits well enough to be ready for the final fitting. It will then require more sanding to make all the shapes fit more neatly where it buts up to the main frame.
Thursday, 14 July 2011
Drop outs....
I set about getting the drop outs to fit the stays. First I had to cut the stay down to allow the metal section to centre up. Slightly nerve racking as it is a one way event. So measure check, measure check then cut, carefully. I got the top ones bang on, but the bottom ones were still a smidgen too long and had to have a screw drivers shaft with taken off, it was a precise measurement, and worked a treat.
So having got the metal work mostly in shape the thing to do was offer it up. The main adjustment needed to make it all fit was to thin the wood back on the stays. In cutting the stays back, the length of the stay that fitted the tube had shortened, so a quick bit of rasping and they all fitted well.

So having got the metal work mostly in shape the thing to do was offer it up. The main adjustment needed to make it all fit was to thin the wood back on the stays. In cutting the stays back, the length of the stay that fitted the tube had shortened, so a quick bit of rasping and they all fitted well.

Drop outs mocked in, with wheel.
When it all came together, it fitted better than I had expected, so well that I could pop the wheel gently in and see it all there for the first time. All good news, but the point of all this apart from seeing if all the planning would actually work, was to spot bond the metal components with acrylic adhesive so that I can give it all to my colleague Lew to braise up. But I ran out of time, that will have to wait, but its all there ready.
Drop out mock up detail.
Once I get the metal work done I can start the final phase of the project, final bonding, shaping and fine sanding followed by varnish. It all seems possible now.
Today I also spray painted the head tube, so it will be ready for bonding into the main frame. All I need to complete that is the transfer with the PLYCYCLE logo and some spray lacquer.
Name.
I think this bike will be called the 'Plycycle', and in order to represent this on the head tube I have knocked up a logo to go with it.


In other news the drop outs are coming on, getting to grips with the metal work.

Drop outs work in progress.
The next stage is to line up the frame accurately and tack glue the drop out components in position ready for braising. Inside they are scuffed ready for fixing to the frame. I just have to decide what adhesive I will use. I was planning to use the same epoxy as everything else, but I have been given some acrylic structural adhesive, that may just be a bit better. I will do some tests.
Tuesday, 12 July 2011
Reamed!
I collected the reamed and faced head set from Argos cycles at lunch today. On the outside it looks just as it did before, but look inside and the evidence is clear.


Head tube and fin with primer coat.

Head tube faced and reamed inside.
This week I also need to pop back with the forks to get the crown reamed to fit the headset nicely, its a while you wait job at Argos cycles.
But now I have the head tube working I can get on and do the final lamination of the frame.
Sunday, 26 June 2011
Lash it together.
It feels like a while since I made any real progress on the bike, despite having done regular bits and bobs to it over the last few weeks. Today I managed to shape the top stay set.

The way that they have come together after the redesign for the drop out fitting. Now that the stays are roughly shaped, the really tricky bit lies ahead, fitting them to the frame so that they end up square and my wheel runs true. So I fixed them to the frame with tape to see how they will sit.


The two roughly shaped stay sets.
The way that they have come together after the redesign for the drop out fitting. Now that the stays are roughly shaped, the really tricky bit lies ahead, fitting them to the frame so that they end up square and my wheel runs true. So I fixed them to the frame with tape to see how they will sit.
Stays taped on frame video.

Stays taped onto the frame.
I was very pleased that they do actually meet pretty much where I had hoped they would. Of course using tape is not a real guide. The next step in the build is to cut the excesses down on the end of the stays so they are square. Then do the same in the frame and see how it sits then. I have a feeling that I may need to add another section of ply in the bottom bracket join, as I may have cut too much away. Not sure yet.
Once the stays are fitting well it will be a case of tacking them in with wood screws and measure up and make the metal drop outs. Once those work I can do the final shaping and sanding then fitting. Once together that is it, no undoing it. I liked the way it looked so much I propped a wheel up in the frame, and y'know what? It started to look like a bike. I also took the opportunity to see how the drop out might place.


Once the stays are fitting well it will be a case of tacking them in with wood screws and measure up and make the metal drop outs. Once those work I can do the final shaping and sanding then fitting. Once together that is it, no undoing it. I liked the way it looked so much I propped a wheel up in the frame, and y'know what? It started to look like a bike. I also took the opportunity to see how the drop out might place.


Prop a wheel in just to see. Drop in the drop out.
Sunday, 12 June 2011
Glue it together.
I did the first big epoxy bond of the main frame. Judging the correct amount of epoxy to mix up was a pure guess really, and in the end I got it right, just. There was only a teaspoon full left over. It was great to see it come together and to take the clamps off and feel it as one piece at last.


First epoxy of main frame sections.
While the frame was going off, I took the opportunity to start shaping the stays.I cut a section of the 22mm tubing to fit the end of the stay to. It needed a lot of thinning down, more than I had really appreciated, but the end result looks fine and with a bit more attention will come together nicely.

Unshaped (before) and shaped (after).

Drop out tube attached to end of shaped stay.
Just got to match the second stay to the first, and then fit to the frame for the measuring, making and fitting of the drop outs. I also have to true up the sections of the frame where the stays meet the main frame so that they fit squarely.
Thursday, 2 June 2011
Final off the shelf parts.
The order from Ceeway came in this week. Some great stainless steel dropout blanks and stainless faces to be braised on. Also the 22mm cromolly tube that the drop out will be welded to and the wooden rear stays will slot into. All I have to do now is shape the wood to fit, then braise the joints together. Ha, simples!


Drop-out blanks, faces and 22mm tube.
So now I have all the bits I need to complete. I just have to find the time to make it happen. Just as before I will be stealing an hour here and there between work and family. I really want to get this finished by my original target, August. I think that is achievable.
Also thanks to everyone who is giving helpful comments and advice via twitter and this blog. Much appreciated.
Tuesday, 31 May 2011
Fitting the metal work.
I really felt like I have made a step forward with the coming together of the metal parts and the main wooden bike frame. So what did I do? Well.... I split the frame into its two halfs and inserted the metal pieces to daw around them.

I then routed out inside the markings to allow the plate sections to neatly sit between the two halfs of the frame. I also cut some slightly deepersections in the center of each plate to allow some extra epoxy to create a plug. The plate will have some holes drilled in it eventually to allow the epoxy to bond though.


Bottom bracket lined up for marking.
I then routed out inside the markings to allow the plate sections to neatly sit between the two halfs of the frame. I also cut some slightly deepersections in the center of each plate to allow some extra epoxy to create a plug. The plate will have some holes drilled in it eventually to allow the epoxy to bond though.

Botton bracket fitted.

Head tube fitted.
At the mement the pieces are fairly loose fitting because of my relative inexperience in this type of building. I think that the epoxy resin will help me out here.
The next few steps are fiddly and there will be no aparent progress, as in new parts. Its just bonding, and tweaking to get the rear stays to fit. Rear drop out parts are in the post, and will heavily influence how the back end of the bike turns out.
Saturday, 28 May 2011
Metal work, works!
I have in my grubby hands two pieces of metal work greatness. Lew ( the engineering man) made the parts up for me from my card board templates. I had stock head tube section and a standard blank bottom bracket shell from Ceeway, which I bought back at the start of the wooden bike build in order to measure up to. As the wooden frame came together and I understood more clearly where and how the metal parts would need to fit, I was able to discuss the detail with Lew. He then made a jig to hold the plate at 90 deg' to the tube as he braised them together.

Hopefully this shows how I intend to sandwich the fin between the yet to be laminated wooden layers that make up the wooden bike frame. The Head tube has a wedge shape to it in an effort to increase its holding strength in the frame, it may well be bolted through as a precaution too.


Head tube and fin fixing.
Hopefully this shows how I intend to sandwich the fin between the yet to be laminated wooden layers that make up the wooden bike frame. The Head tube has a wedge shape to it in an effort to increase its holding strength in the frame, it may well be bolted through as a precaution too.

Bottom bracket with fitting fin.
With the bottom bracket, we decided to take the fin all the way around the shell. Originally I had intended to have the bottom section of the bracket shell exposed with the fin similar to the head tube. But then I decided to surround the shell with wood, and after discussion with a couple of engineering types it seemed a good idea to get as much strength into the bottom bracket area as possible. It seems obvious, but the stresses going through this section are huge, especially if I go fixed gear or single speed with the bike. Gearing it will drasticly reduce the loading, but I don't really want that.
Next I need to paint the bits that will be exposed to the outside, while leaving the bits bare that will have direct epoxy resin contact.
I have also just ordered from Ceeway, two blank stainless track style drop outs and some 22mm tube to make the rear stay/drop our connections. I had hoped to use the left over head tube but it was just too big at 31mm diameter. Ceeway is just a treasure trove of frame building bits.
On the wood working front, I hope to have the stays shaped soon and if the weather is warm enough I will have a go at the first stage of bonding the four frame layers into two halfs.
Thursday, 19 May 2011
One step forward another back.
I just popped in to see Lou the engineer, and he has the bottom bracket plate cut, ready to braze onto the bottom bracket shell this weekend along with the head tube fitting. This is amazing as he is very good at what he does as well as being an ex cycle racer back in the day and is really keen to help me out. Can't wait to see the finished items.
The set back is not that great, but i am going to have to re-cut the six rear stay sections. After a brief chat with Lou last week, we decided upon a slight redesign in the rear stay set up. Mimicking a traditional rear stay with a tube butted onto a plate, but over sized. My original design was based on what i could achieve, with with Lou happy to help out the design can be improved and made more complex.
so I will be laying out and cutting this weekend.
Also just to mention that the epoxy resin test (pictured below) went very well indeed. When cured the strength gain is immense, I tried to snap it but I couldn't. It was only when I tried to prise it apart with a chisel that it started to go, and it resisted that well too. That is good news.
The set back is not that great, but i am going to have to re-cut the six rear stay sections. After a brief chat with Lou last week, we decided upon a slight redesign in the rear stay set up. Mimicking a traditional rear stay with a tube butted onto a plate, but over sized. My original design was based on what i could achieve, with with Lou happy to help out the design can be improved and made more complex.
so I will be laying out and cutting this weekend.
Also just to mention that the epoxy resin test (pictured below) went very well indeed. When cured the strength gain is immense, I tried to snap it but I couldn't. It was only when I tried to prise it apart with a chisel that it started to go, and it resisted that well too. That is good news.
Thursday, 5 May 2011
The frame shaping continues.
I have ben bevering away at making the shapes on the ply wood frame look good. I relly like the way it is turning out now.


I am going to get the resin soon and then take out the center two layers so that I can drill them out to reduce the weight. Next fabrication job is to cut and shape the rear stays.
Friday, 29 April 2011
I started again. Wooden bike frame MK2
I did it, I started again. The wooden bike frame had got to a point where I had to make a decision, as I explained in the last build post. It just didnt feel right. So I umm'd and arr'd and eventually I jumped into my van and went to a new ply wood supplier. Avon plywood. They were brilliant. I talked it over with the man there and we decided that I should go with Birch ply, my original plan. I bought a sheet of 12mm birch ply and set to work.
Having done it once the second attempt at the wooden bike frame came together much faster. In a couple of hours I was back to the same place as the first frame.


Having done it once the second attempt at the wooden bike frame came together much faster. In a couple of hours I was back to the same place as the first frame.
Work in progress.
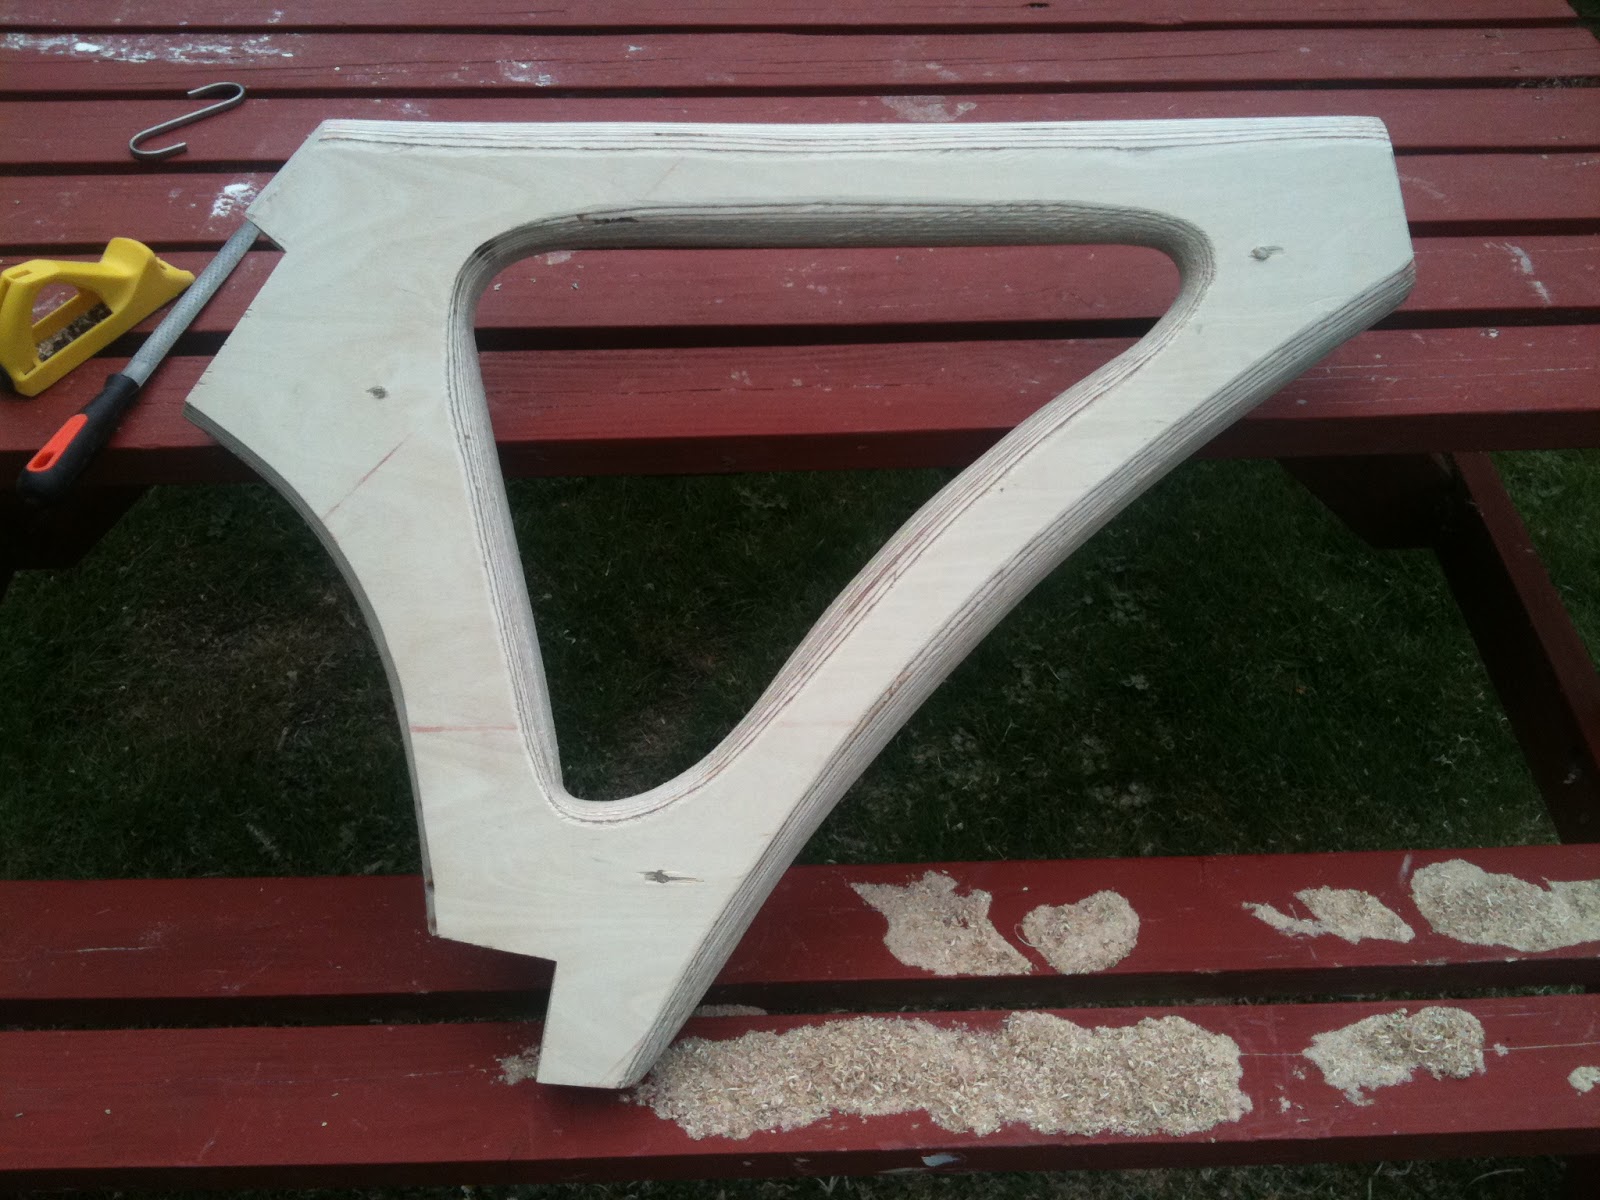

I took the opportunity to make an amendment, I noticed that there was possibly not enough space for the seat post to slot in and maintain enough strength, so I extended this in the new frame.
The first most striking difference apart from being much lighter in colour, is that bitch ply has many more possibly twice as many laminate layers as the hard wood ply in the same cross section, this gives it a very different feel. The birch is also easier to work on. The look as the curves are worked in is much more striking (see the video) and I have a much better feeling about this build.
Old frame MK1 darker - New frame MK2 lighter.

The main reason for loosing confidence in the last frame was the amount of air gaps between the laminate layers. Looking this over with the fella from Avon ply, he thought it was just bad luck on my first sheet of 25mm hard wood ply. However, the new wood has no voids yet. This gives me renewed confidence, as I was hatching all sorts of plans to inject epoxy resin into the voids in the MK1 frame.
Just seen this has uploaded sideways, sent from my phone, didn't check it, didn't keep it, that'll teach me.
As you can see in the vid, I have now got four layers of ply wood in the frame. This will mean two extra fixings of epoxy, but will make the cutting out of the middle two layers for weight reduction much easier as I would have had to use a router on MK1. I can just use a large hole cutter on the two matching middle sections.
I am really glad I started again, I feel much happier about it now, even if I have had to spend on a new sheet of ply. I learnt a lot on MK1 and know that MK2 will be better.
Tuesday, 26 April 2011
Rear hub...
So, I said back in the beginning that this would be a fixed gear bike, and so it probably will be. But my attention has been drawn to an amazing hub gear from Sturmey Archer. It is a two speed kick change back pedal brake hub. Yes a bit of a mouth full but its amazing. No cables! Just kick back to change between the two gears. There is a free wheel, but put in a back pedal and it is a traditional American style brake. I love the fact that it will need no cabling. It is £70 for the hub only, which as nice hubs go is not that much, but in truth is probably more than I want to spend on this project right now.
It would be nice though.
It would be nice though.
Saturday, 16 April 2011
Cutting the frame....
So I did it I took the saw to my quite expensive piece of ply wood. It is the bit I have been looking forward to the most in this whole wooden bike building project. The first cut. I used the card board templates to mark out and just got stuck in. As it turns out I have enough ply for a second attempt if I make a boo boo on this first attempt.


I cut two pieces from the same template, which are now mostly the same shape. Next I need to temporarily fix them together so that I can shape them to be exactly the same shape. This will also include detailing and trimming to reduce weight.
I also marked out a rough template for the rear stays, but they are not cut out yet, the video shows the two parts of the frame, cut and lying together.
I have decided to use West Systems Epoxy in my build. It looks like it will do everything I need. Most of all they put out a really great info booklet and DVD to help first timer like me. The main place the epoxy will be used is to join my two halfs of the frame and probably to reinforce internal sections I router out for weight saving.
Tuesday, 15 March 2011
Design asthetics.
Making the first steps into bike design and frame geometry was interesting, but it produced a bike that was very conservative in its apearance. If there is one thing you can do when making your own bike, it is to personalise the design. As with any design proces it is all abut personal tase. I am not going to go really radical, I like simple, and I like curves, so I am going to try and work both of those into the shape of the bike frame. I also want to make the most of the plywood. I intend to shape the square edges back into curves, revealing the lamnated layers of the ply. I really like this look, it reminds me of map contors. In order to do this I have to make myself happy that the smaller components will still have enough strenght once shaped, as it could be taking a considerable volume of material away.

With the above in mind I had a go at reworking the first draft bike design. I relised that it would be a good idea to shorten he rear stays as mych as possible, so I curved what would be the seat tube to follow the line of the wheel. Now the rear stays will be the minimum length. They will probably need to be a wishbone shape to fix in well. i had thought about making the seat tube follow that curve but i want to have a propper ajustable seat within the frame so for the moment it is a chunky block there. I tried cutting a shape out there but it always looked odd, so I stuck with it being solid. I also started looking at where the bolts would need to go for the joins between the metal and wooden parts. Although not visible in this image, I have started designing the metal components, they will be embeded in the wood of the frame. Again I want to b sure that they will be strong enough. (notice the crank wheel is on the wrong side, this is just so I know where it will sit)
The most vital thing for me to keep an eye on at this stage is to design something that I am confident I can actually build. It is all to easy to get carried away. So far so good.

The most vital thing for me to keep an eye on at this stage is to design something that I am confident I can actually build. It is all to easy to get carried away. So far so good.
Monday, 14 March 2011
Bike design, next step.

I took the BikeCAD image below, with its acurate angles, (but designed with a steel frame in mind) and copied it in illiustrator. This llowed me to start plying with the proportions of my wooden bike design. It is amazing how fast little details acumilate and have a knoc on. For example, the only way to maintain the geomtry of the frame that I designed in BikeCAD, and add material for strenght, is to
increase it into the central frame viod. This in turn makes the botom bracket fixing point rather out on a limb, very low down. So that needed tweking and beefing up and so on. The above is by no means the answer, but it isthe first time I have seen what the shapes may actually have to look like. This will (I hope) evolve as I add detail and the inevitable probems arise.
Subscribe to:
Posts (Atom)