PLYCYCLE

Take a look at the finished bicycle here.. www.plycycle.co.uk

Friday, 26 September 2014

2014 and still going strong!

It is the end of September 2014 and I have been riding the Plycycle all summer and it is still going strong. Since completion in 2011, I have had to replace the forks as I originally bought cheap ones and I stripped the thread on them. Other than that it is all great.

It is a pleasure to ride, even in hilly old Bristol.

Plycycle - wooden bike out in Bristol 2014.

Sunday, 7 April 2013

Plycycle Mk2

Building on what I have learnt making this bike, the Plycycle, I am making a second, the Plycycle Mk2. Not the most original name I know. There is a new blog here 


Monday, 10 December 2012

The plycycle and I make it into a magazine...

Ha, so I was helping my pal Gav Strange out with his Fixed and Chips race, when the editor of a bike magazine who was covering that event ( which was very cool by the way ) asked me if I would be in it with the plycycle. Well i thought about it for a milli second and said yes.
So here is the evidence.


Here we are in the Urban Cyclist magazine.

I am pleased to say that the Plycycle is still going strong, I love riding it and it is admired at every turn, which makes me feel proud. Long may it stay in one piece.

Wednesday, 4 April 2012

www.plycycle.co.uk


STOP PRESS!

I have made a website just showing the finished PLYCYCLE. It is www.plycycle.co.uk There are lots of new images of the bike so you can see it in better detail, just head to the gallery page.

I hope it works, it is on a free hosting site and does run a tad slow and it has a small add banner, I do apologise.

Monday, 26 March 2012

Bespoked Bristol.

It was a lovely sunny weekend over the 24th -26th of March here in Bristol, which made getting on the Plycycle and riding down to Bespoked Bristol to see the show even better.

It was the first proper ride on the Plycyle after the winter and it was amazing. It really is a lovely ride, even if i do say so myself. When I parked the bike outside, I felt awkward leaving it for the first time, but i set off into the show. When I came out there was a small crowd around it and my chest swelled with pride. I answered a bunch of questions, yes I made it, no its not so heavy, no I don't really know how strong it is.... etc, etc.

During the show I found not one but two other wooden bike projects. Both more evolved than mine, but both tackling the same challenges and both with different results. After talking with them I felt that my design was strong and I had tackled common issued in a similar way. It gave me confidence that my bike will be strong in the long term.

First I found the Flat Frame System booth with Mike there to answer questions about his work. It was great to meet him and see his wonderful bike.


The Flat Frame System bike.

Then Just as I was leaving I saw Axalko company outside with their bike. It is a very serious pro bike similar to the Renovo set up. It is a very impressive machine. Enrique from Axalko was very generous with his time and it was great to see a young company with such passion taking on the bike world of metal.

The Axalko bike.

So having absorbed lots of lovely bikes at Bespoked I set off home on the Plycycle, it was such a lovely day and the bike felt so good I had to take the long way home.

My bike wooden bike, the Plycycle, out and about.


Tuesday, 13 March 2012

This blog as a book.

I have made this blog into an actual physical book and e-book.  Click here to see it.  I thought it would be nice to do, just to have it in my hands, but also because it makes it easier to see the project as a progression. The only bits missing are the videos, other than that its all there.
But possibly the best reason is that I can now show my Grandmother who loves books and has no intention of looking at a blog.

Thursday, 19 January 2012

Wooden bike out and about.


I was riding the finished wooden bike around the city docks the other day and took this. It is a great bike to ride, really comfortable. I am still thinking about putting the Sturmy Archer 2 speed /roller brake hub in the rear wheel.... One day.

Friday, 30 September 2011

The plycycle in the sun. Plus, accounts.

It was a sunny day, so I took the plycycle outside and took a few quick snaps. Soon I will take some proper photographs and make a site to show them off at www.plycycle.co.uk but at the moment will that link will bring you straight back to this blog.


Also, quite a few people have asked how long and how much it cost to make. Well I didn't keep a diary of the actual time it took but I have totted up the time I think I spent on it and it is about 42 hours over 6 months. However I think it would take longer than one working week to repeat because outside the actual hours I spent working on it is all the time allowed for curing of resins, paint and varnish. that would probably double the build time.
As for the cost.... well I kept the receipts and did some adding up. I nearly fell off my chair. It cost more than I thought. Its lucky I didn't charge myself labour. 

Tools           £  58.35
Materials     £213.78
Cycle parts  £  92.33
TOTAL       £363.03  

The funny thing is that the core material of plywood cost £38, the rest was on bespoke metal tubing, epoxy, varnish, spray paint etc. The frustrating thing was that often I had to buy lots more of something than I actually needed, so that has possibly inflated the actual price of some items. As for the bike parts, most came off my fixie, so actually saved lots there.

I suppose that for a hand built one of a kind bike it is not a bad price, and spread over six months it was not so bad.

Monday, 26 September 2011

The PLYCYLE, it works!

At last the chain arrived, I quickly fitted it in the exhibition space at Aardman and got the bike outside as quickly as I could. A couple of pals joined my for the maiden ride and we filmed it.

The first ride of the plycycle.

I have to say that it made me beam from ear to ear. I was happy that at long last I could actually ride the bike I had set out to make back in March.
How does it ride? Well it is well balanced, and stiffer in the frame than I had expected. There is substantial twist in the frame if you push hard on the pedals off the line of the crank, but I expected that. It is however less than I had anticipated, which is good news.
I now want to do some proper test rides and carefully find out if it will be strong enough for the road. 
But whatever happens next, I am pleased as punch that the project became a reality.

I also have grown to really like the handle bars that I put on so although I had thought of making a wood/aluminium hybrid bar, I dont think I will now.

The plycycle lives.

Friday, 23 September 2011

On show.


The plycycle has been on show as part of the Aardman Animations (where I work) staff 'show and tell' exhibition of personal creative projects.


It is sporting the new stem set, but still has no chain, and is therefore still unridden.

Saturday, 17 September 2011

Its finished...mostly.

It is mostly finished. Here look......

The mostly finished plywood frame bike.


So why is it not finished? Well I have all the bits except about 10cm of chain. In my excitement, I bought the chain I wanted without checking that it was long enough. So I need to buy another chain to match and make it up to length. Then the bike will be ridable.

I have sat on it and it didn't break, that is an achievement in itself.

However I am going to make some substitutions of some components. Mainly the stem. I fitted a classic Campagnolo style stem and I think it looks a bit weedy on the fat wooden frame. It also rakes down which I am not so keen on now. So I am changing it for a black ahead stem that will slope up to the bars. It is also a clamp type that will allow me to fit the wooden handle bars (with ally bar re-enforcement) I am hoping to make next.
I am also undecided on the bars I put on or if flat bull horns would be better. If  I make bars they will be flat bull horns, a bit like the 'Charge' ones but without the upturn on the ends.

Mostly finished bike movie.

What bugs me? Well heaps, as you can imagine. The seat post is not at an angle that lies true to the frames angles. Also it slipped in its grips when setting and the seat sits ever so slightly off true. The varnish is thicker and more gaudy than I had expected. I should have done a test with it. There are lots of bumps and bits where I have either rushed or not thought a process through properly.

However. Having said all of the above, I am very proud of what I have made, having never attempted anything like this before, and having done it from my garage.

Remember this....

It ended up pretty close.


Tuesday, 13 September 2011

Varnish...at last.

Finally I am putting on the varnish. Each time I went to do it recently I found another little thing that I had forgotten to do. Just lots of little things like drilling the holes for the sheer bolts that will strengthen the rear stays. The big one was that I hadn't drilled the big hole for the seat post, and it was much more tricky than I had thought. Mainly because I didn't have the right clamps or bench to hold it securely in the correct position. So I gerry rigged up my workmate with a small pillar drill. It worked OK, but did cause a bit of vibration to begin with when I had the bit extension fitted, which caused the top of the whole to be , well, not round. So I took the extension bit off and managed to drill with the standard bit, just. But the damage was done, once the seat post was fitted I filled the wonky top of the hole with epoxy and sanded it back. Not perfect, but I have a seat post in now.
The seat post is permanently fixed in with epoxy, I thought I only needed to fit me.

See my less than ideal drilling rig.

I have done the varnish primer layer, thinned 50/50, I have done a first coat thinned 75/25 and I have done the first neat coat. one last coat and then wait for it to set. The varnish will take about 4 days to harden properly, then I can bolt it all together.

Varnishing in the dark....


The varnish making it look all shiny.

The way the varnish has brought the wood to life is amazing. I really didn't expect it to work as well as it does. I have used Hemple varnish and thinners and it has been great. Designed for boats, it is flexible, durable and has UV protection, hopefully that will cover every thing I need it to do.

Thursday, 1 September 2011

Sanding.

I have been sanding, sanding, sanding, sanding, sanding and sanding some more. Nearly ready to varnish.

Just got to drill a hole for the seat post.

Also, this project made the final edit of a Fixed gear bike documentary a friend of mine made, which I was interviewed for. The film is called BOIKZMOIND keep a look out for it.


.

Wednesday, 24 August 2011

The wooden frame!!!!!

Here it is, fresh out of its clamps, the two halfs finally fixed together with the metal bits and the rear stays all in ONE PIECE!

The frame all in one piece for the first time.

And a vid of the frame.. all in one piece for the first time.


What this really means is that the project has taken a massive step into the final phase. Sanding off all the resin seapage, and final smoothing to make it ready for varnishing.

I could put it together and attempt to ride it, but really I need to put the saddle in and the final strengthening bolts in the topof the stays. Its going to be tough, but I am going to resist.


Monday, 22 August 2011

Fixing and Gluing... Well epoxying.

   I got to a point of no return, having got all the metal work finished, the final laminating of the main frame was upon me.

Prepping for the final epoxy fix on the main frame.

It meant a lot of guess work around the amount of resin I would need to mix up for the job, and in the end I was slightly short and had to do a hasty additional mix. The west system epoxy I have been using has been great, really easy to use at every stage. I put in the metal head tube and bottom bracket sections after the initial 'wetting up' and from there there was no going back. It was just lining it all up and clamping it into position, then cleaning down any excess epoxy after clamping from around the metal parts that I would nor be able to sand back later.

 All clamped up, just need to wait for it to go off.


Head tube with decal, fixed in, no going back.

I also managed to get the back end all lined up, and fixed with epoxy the day before. It was slightly less nerve racking, although I don't know why because technically it was harder. However it all worked out. I had drilled small holes in the inside of the metal drop outs where they join the hanger to allow excess epoxy to squirt out, as the fitting with the wooden frame was too tight at the join to let it out. It allowed me to put plenty in and not worry about a dry join. When I was fixing them together I measured from the center of each stay where it joins the frame, to the end of the drop out to get them centered. I also delicately popped the wheel in to see how it lined up, it was good.

Back end all epoxied together.


Next steps are to fix the main frame and back end together, to have THE WHILE WOODEN FRAME  together as one for the first time. Then to do final shaping and sanding ready for the posh yacht varnish I have procured.


Monday, 15 August 2011

Moving on.

So I made the change to the head tube angle, this will have to be it, there is no going back now. Unfortunately during the fitting and reshaping of the wood, I pranged the paint on the head tube really badly. I have had to rub it back and repaint it, which is a real shame as It was a good paint job and the head set was fitted so I have had to spray over and around the installed headset which is not ideal. But i think it will be fine.
If I hadn't messed up the head tube paint, I could have resined the main frame together, but that had to wait, will be the next job, then i can do the final shape and sand.
Rear drop outs are sprayed in the shiny green colour, just need lacquering, then I can resin the rear set together.
I also spotted a pair of leather handlebar grips on eBay, couldn't resist.

Friday, 12 August 2011

The fix?


      I have had a good look for some replacement forks second hand, and there are some nice ones out there but I cant use them because I have made the head tube on the plycycle longer than average. All the second hand forks are cut down. I don't want to 'fork out' for a new set, so I am going to work with what i have.

How did the front get so out? Well... The head tube is longer (for strength binding to the wood) and therefore lifts the front of the frame, and the forks are slightly longer (off the shelf and cheap) and although individually these extras don't seem like much in the end it is about 3.5cm of lift. Enough to radically move the front of the bike away from what I had in mind.

I put the photo of the bike into photoshop and measured and analysed and this is what I think.
with the forks I have I will never get the top of the frame horizontal with the ground, I can handle that, just. As for the relationship of the front wheel to the main frame, I can play with that a bit. Luckily there is plenty of room to adjust the angle and position of the head tube mounting. So I propose moving the head tube back and steepening the angle. This will take the top of the frame further from the horizontal but I think will bring the bikes proportions back together.

Looking at the angle change in photoshop.


Hopefully I can make the tweak easily enough, and then it really is put it together time.


Wednesday, 10 August 2011

Its a wooden bike.. of sorts.

Today was a big day. I had gathered up all the remaining bits of metal work that had been having bit and pieces done to them and finally cobbled the bike together.

And this is what it looked like.
The Plycycle  cobbled together for the first time.

It was mostly a success. Well the back half and the main frame anyway. I am really disappointed with how the front forks have fitted. It is my fault, I just hadn't appreciated how much different they were to the ones on my old fixie that I had based the geometry on, I bought these cheaply on eBay. It has had two main effects. The first is the gap between the front wheel and the frame is too much. Compared to the rear that is compact and more balanced it feels out on a limb. The second is that it takes the top of the frame of horizontal. Not what I had wanted.
So what do I do? The bike will work perfectly well as it is, and I dare say that once it has a saddle and handle bars fitted it will not be so noticeable. However, having got this far and to feel this disappointed makes me want to do something about it. 
My plan is to try and find an old/vintage or second hand racer forks which generally have about half the distance between the crown and the wheel that the cheap bulky pair I bought have.
We shall see, if I can find a set that fit my existing head tube, and don't cost much, then perhaps I will be aesthetically saved.

Have a closer look on this vid.

Plycycle  cobble, vid, 


Sunday, 24 July 2011

Sanding and shaping.... Again.

This weekend I have spent time working on the wooden frame again while the metal parts are being braised. It seems like a while since I have actually worked on the frame.
I spent some time refining the shape of the taper into the rear wheel, first making the curve closer to that of the wheel and then tidying up the actual taper. I am not aiming for perfect lines as I have always wanted this to be clearly hand made, however I am also wanting to create something I will be proud of. If I had unlimited time I am sure I would refine and remake parts until I was truly happy. Isn't that always the way?
Anyway I have been using a cutting disk on an angle grinder intended for the light shaping of mild steel. However my father in law tried it on wood one day when we were restoring my wife's Morris Minor, not only did it work, it worked really well, and best of all did not over heat or clog up. It also only leaves light ridging that sand out really easily. I will use this for the final shaping of the frame once it is bonded into one.

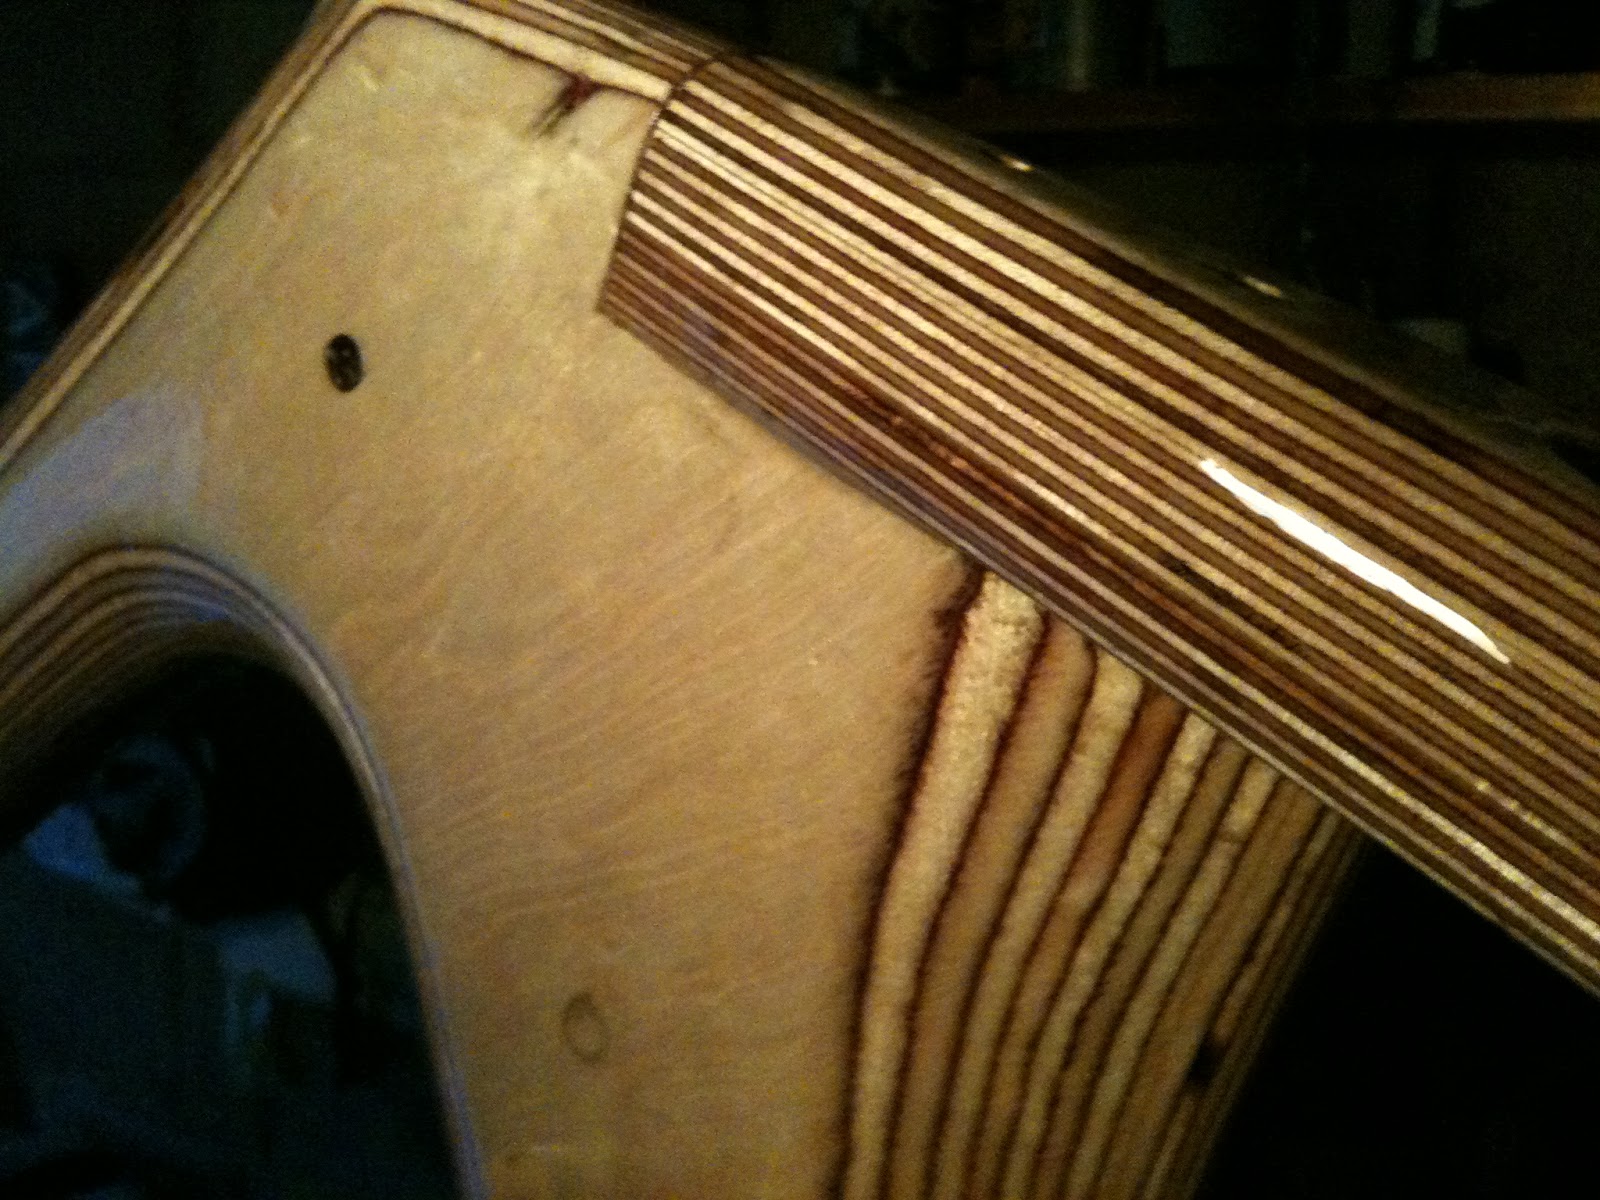
Another job I have started is the chocking up of the bottom rear stay, having cut out too much from the main frame. Luckily I took out 12mm, so the fix was as simple as bonding in another layer of ply.

Rough shape bonded on.                                        Sanded into shape.

I roughly cut the piece and bonded it into the stay, making sure to align the bottom bracket fin slot. Then when it had cured, I set about working it back. I spent a relaxing hour in the back garden just slowly sanding it. I am sure I could have set about it with a power tool or a quicker hand tool, but I just got into the sanding. It was quite relaxing, therapeutic I'm sure. Anyway, I got it to a place where it will fits well enough to be ready for the final fitting. It will then require more sanding to make all the shapes fit more neatly where it buts up to the main frame.